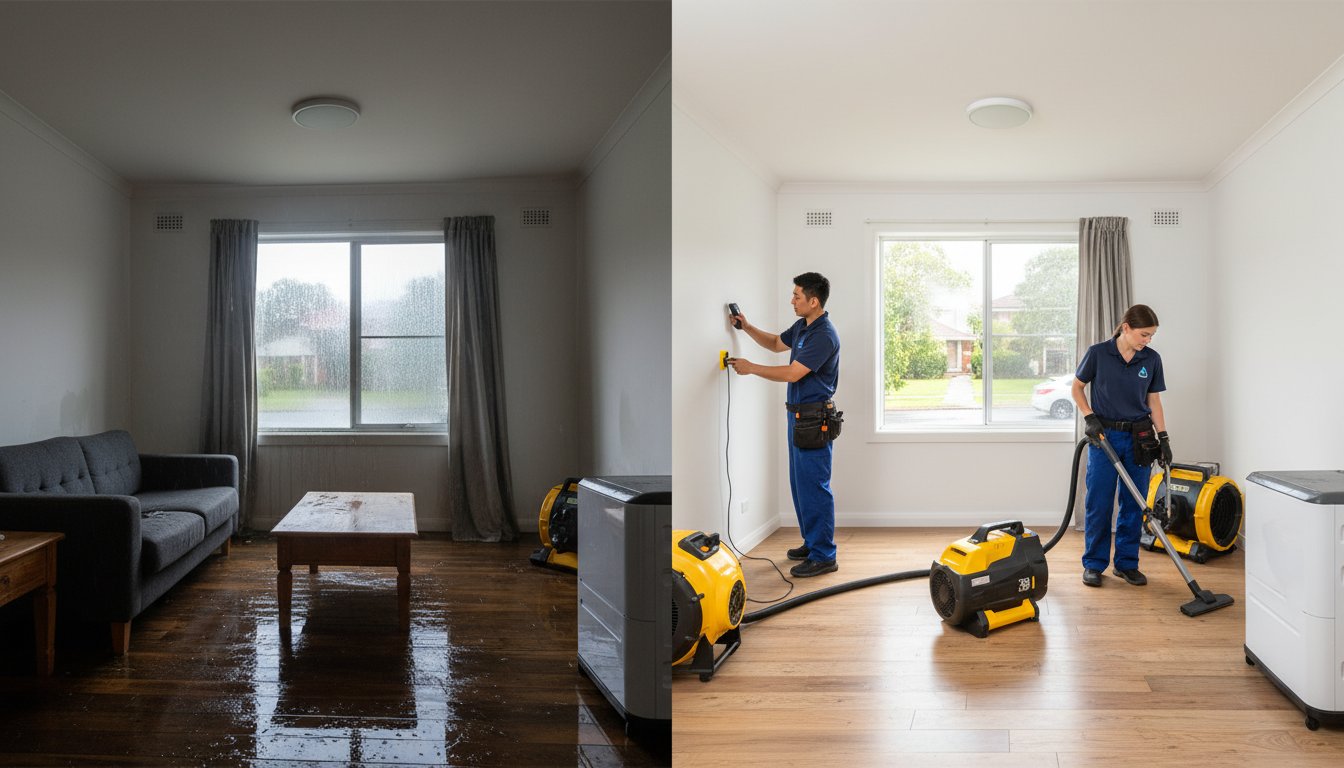
That sinking feeling when you spot dark, fuzzy patches spreading across your walls is a familiar one for many Australian homeowners. It’s not just an ugly stain; it’s a potential health risk that leaves you asking urgent questions. You’re likely worried about spreading airborne spores and wondering, how do you remove mold from walls safely and effectively without making the problem worse? You’ve arrived at the right place.
Don’t wait for the problem to grow. This step-by-step guide is your reliable action plan. We’ll show you exactly how to tackle those small mould patches using safe methods that actually work, giving you the peace of mind that your home is healthy. You will learn not only how to clean the existing mould but also how to identify the source of the moisture to stop it from coming back. Most importantly, we’ll outline the crucial signs that tell you when a DIY job isn’t enough and it’s time to call in a professional Mould Removalist.
Before You Begin: Safety Gear and Finding the Source
Before you touch a single mould spore, stop. The most critical steps in any successful mould remediation happen before the cleaning even begins. Tackling mould without the right preparation is not only ineffective but can also be hazardous to your health. Many homeowners ask how do you remove mold from walls, but the first question you must answer is why the mould is there. Visible mould is a symptom of a larger moisture problem, and simply scrubbing it away without addressing the cause is a guarantee it will return.
Don’t wait for the problem to worsen. Taking a methodical, safety-first approach ensures you solve the issue for good. Gather your materials and identify the source to set yourself up for a successful and permanent removal.
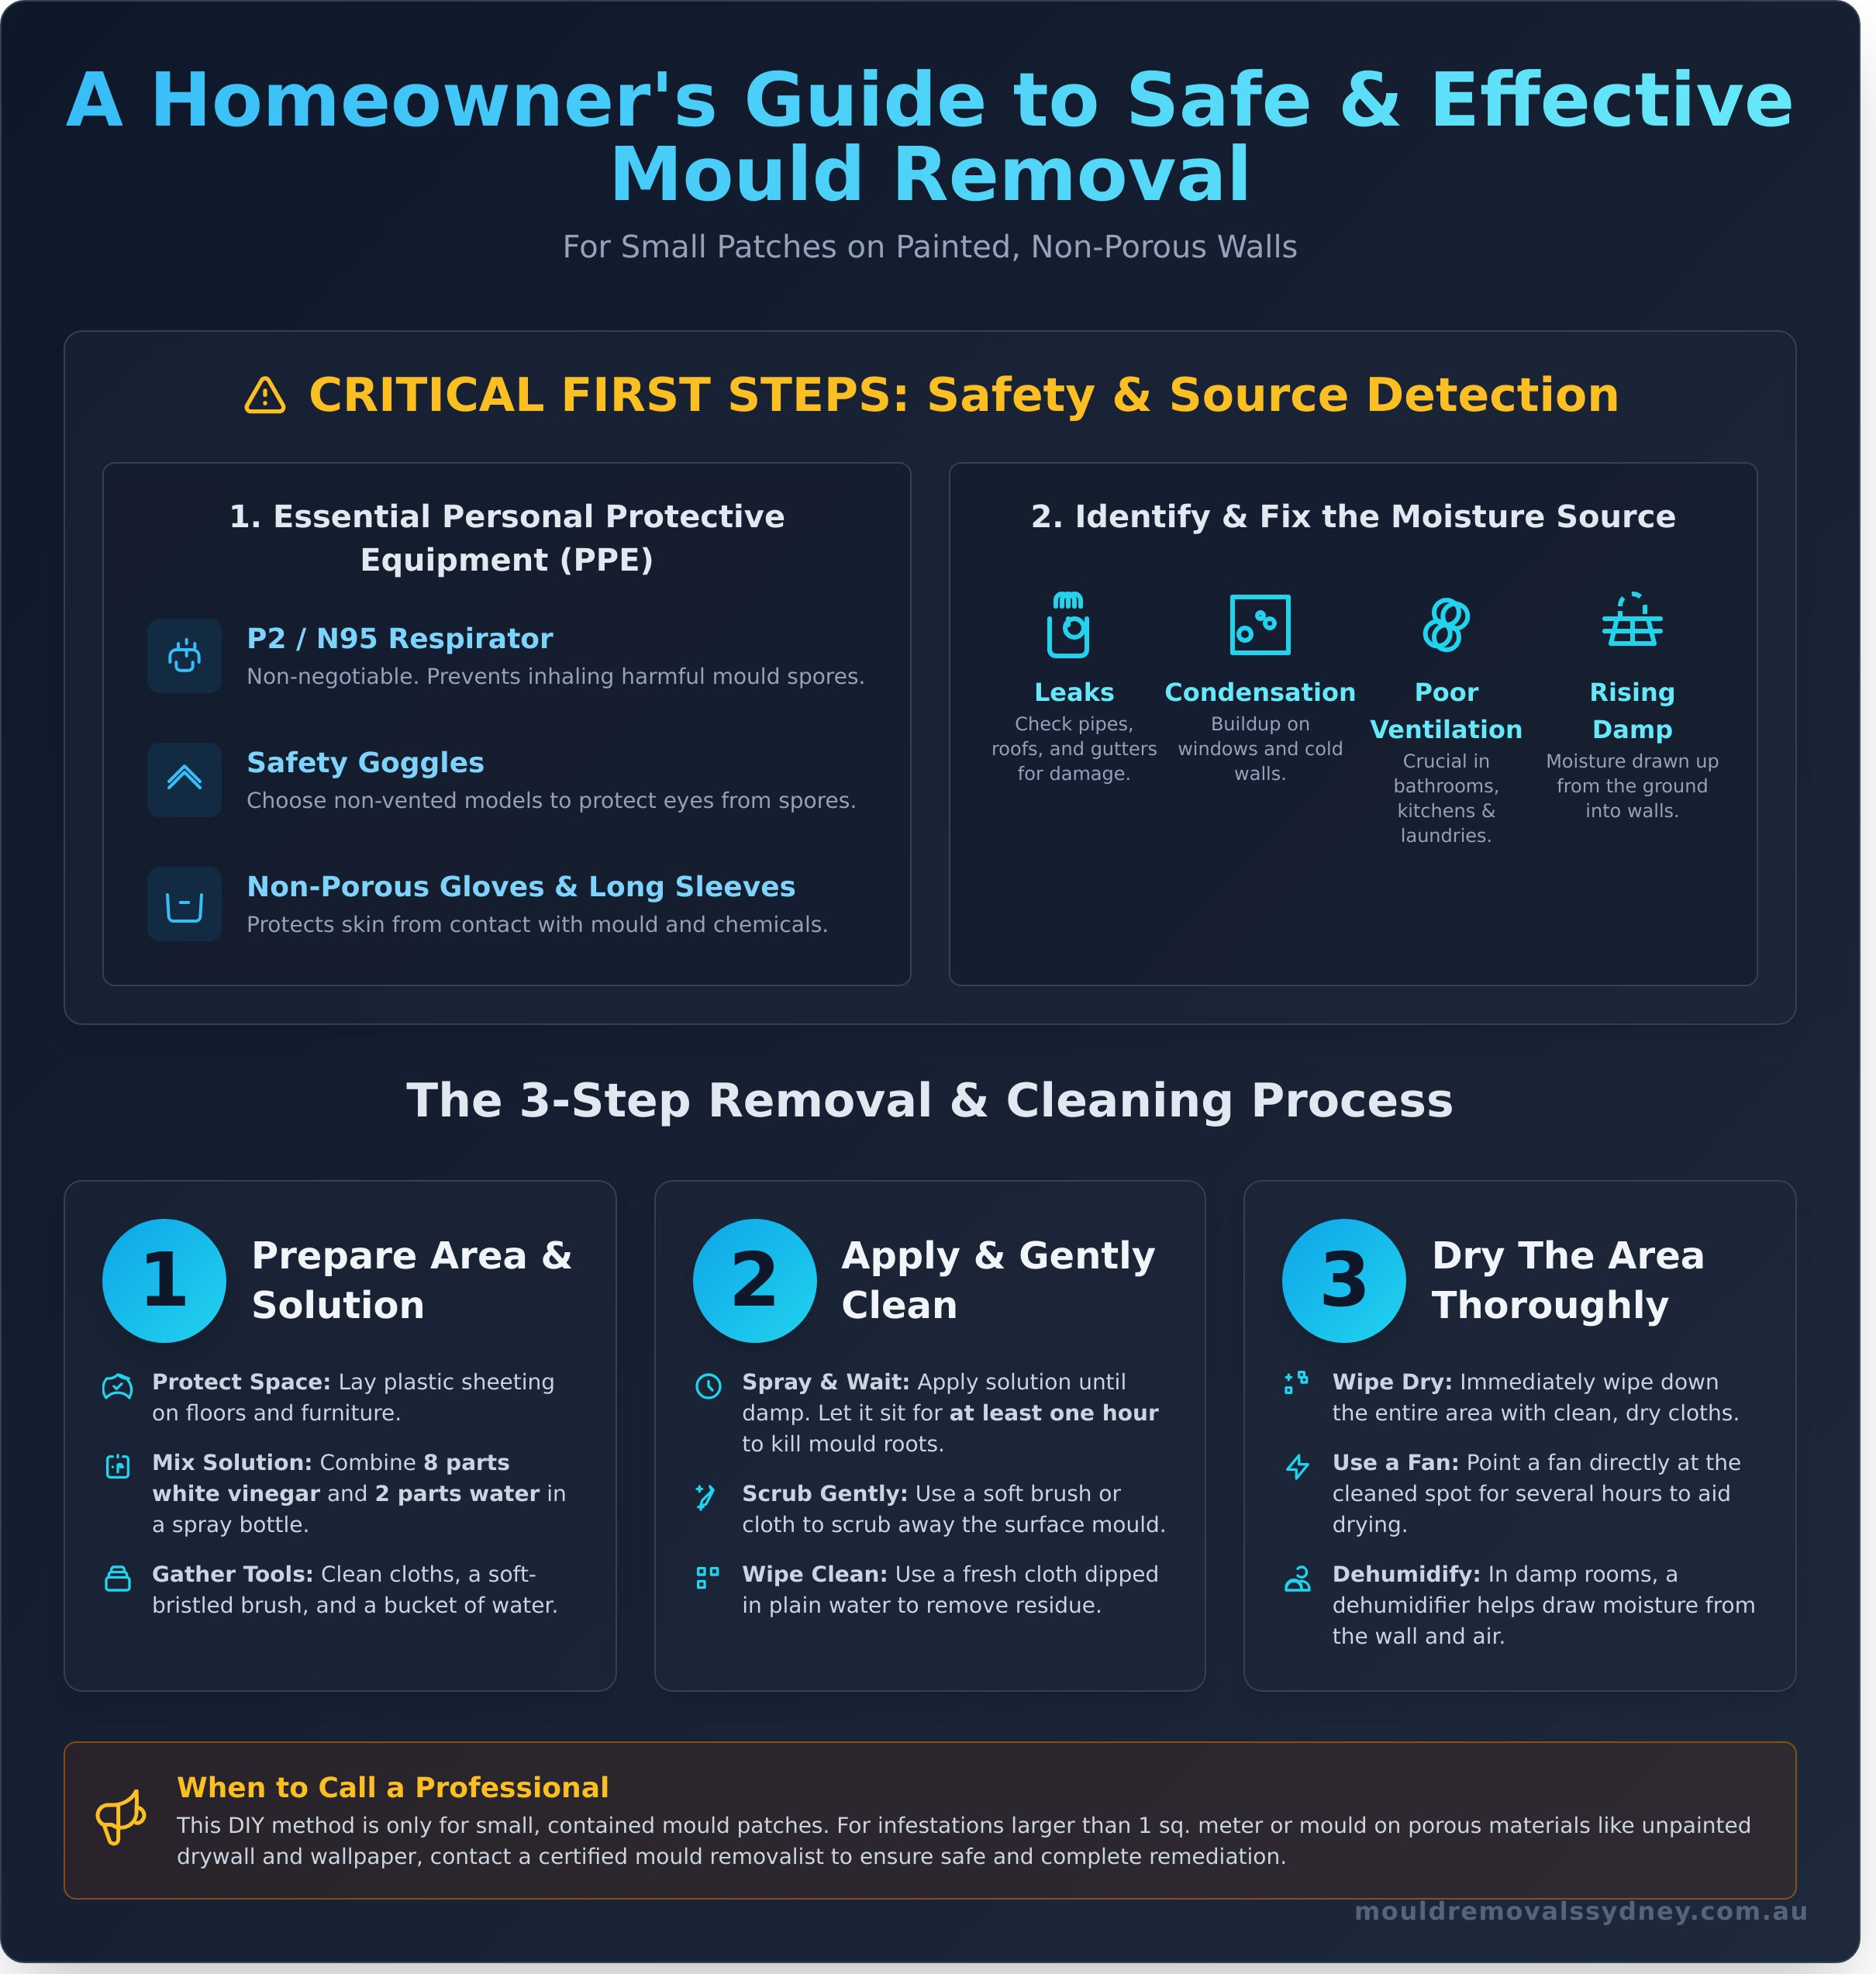
Essential Personal Protective Equipment (PPE)
Mould releases airborne spores that can cause serious health issues when inhaled. Never attempt mould removal without protecting yourself. Your health is the top priority. Before starting, ensure you have:
- P2 or N95 Respirator: This is non-negotiable. A high-quality disposable respirator mask is essential to prevent you from breathing in harmful mould spores.
- Safety Goggles: Protect your eyes from stray spores and splashes from cleaning solutions. Choose non-vented goggles for the best protection.
- Non-Porous Gloves and Long Sleeves: Use rubber or nitrile gloves to protect your hands. Wear long-sleeved clothing to prevent skin contact with mould and chemicals.
Identifying the Moisture Source: Why the Mould is There
Cleaning mould without fixing the water problem is like mopping up a flood while the tap is still running. You must become a detective. To understand the enemy, it helps to first know what is mould? and recognise that it cannot grow without moisture. Your primary goal is to find and eliminate that moisture source. Without this step, your cleaning efforts are wasted.
Look for these common culprits:
- Leaks: Check for leaking pipes inside walls, roof damage, or blocked gutters causing water to overflow and seep into the structure.
- Condensation: Assess windows, corners of rooms, and cold exterior walls for moisture buildup, often caused by high indoor humidity and poor airflow.
- Poor Ventilation: Areas like bathrooms, laundries, and kitchens are prone to mould if they lack adequate exhaust fans or airflow to remove steam and moisture.
- Rising Damp: In ground-floor rooms, moisture can be drawn up from the soil into the walls if the damp-proof course is damaged or missing.
Once you locate the source, you have a clear path forward. Fixing the leak or improving ventilation is the only way to ensure that when you remove the mould, it stays gone for good.
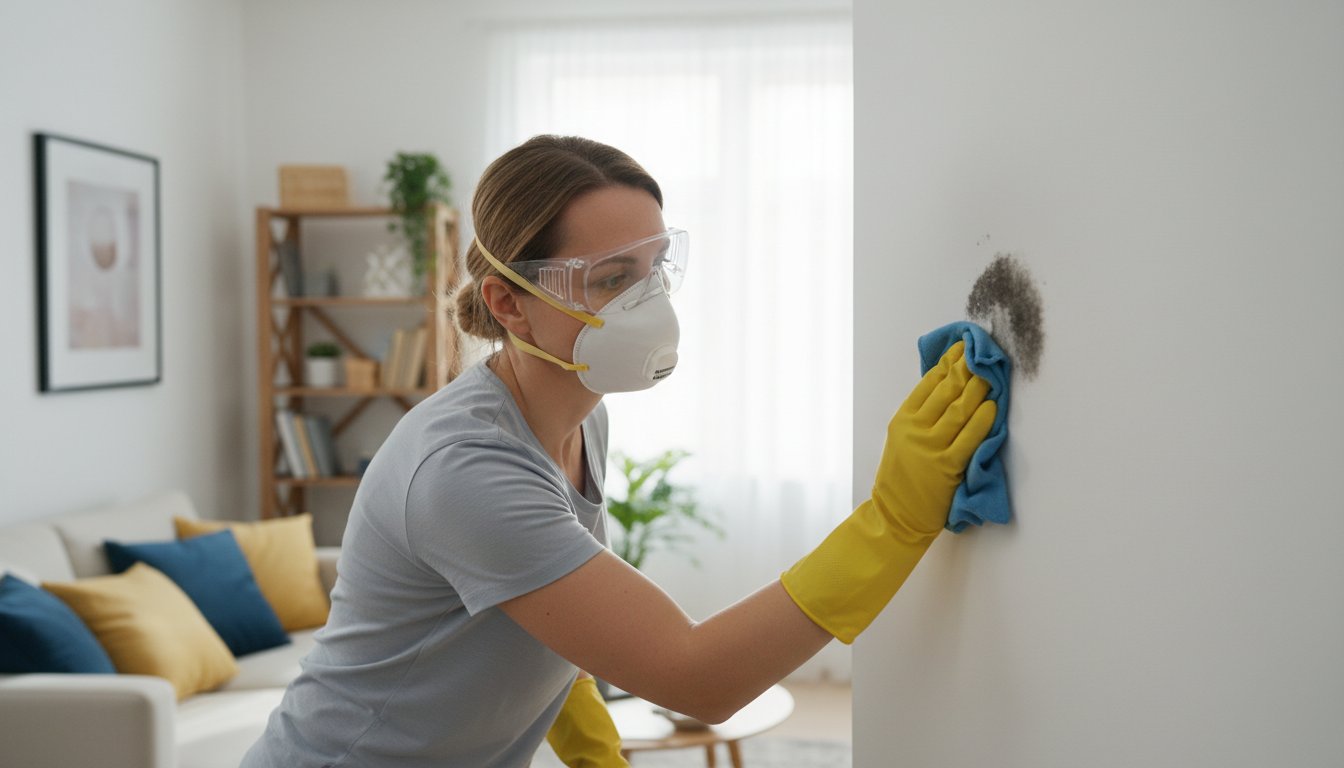
Step-by-Step: Removing Mould from Painted Walls
If you’ve discovered a small patch of surface mould on your painted walls, you must act quickly. This guide provides a safe and effective method for minor infestations on non-porous surfaces. While many people ask how do you remove mold from walls using bleach, we strongly advise against it. Bleach can damage your paint and often only removes the surface stain, leaving the mould’s roots intact to grow back. Instead, we recommend a simple vinegar solution, which is both safe and highly effective at killing mould at its source.
Before you begin, ensure the area is well-ventilated. Open all windows and use fans to create airflow, which helps disperse airborne spores released during cleaning.
Step 1: Prepare the Area and Your Cleaning Solution
Proper preparation is key to containing the mould and protecting your property. Gather your supplies to ensure a smooth, efficient process. It’s that simple.
- Protect Your Space: Lay plastic sheeting on the floor and cover any nearby furniture to catch debris and spores.
- Mix Your Solution: In a clean spray bottle, combine 8 parts white vinegar with 2 parts water. Shake well to mix.
- Gather Your Tools: Have several clean cloths, a soft-bristled brush, and a bucket of plain water ready to go.
Step 2: Apply Solution and Gently Clean
With your area prepared, it’s time to tackle the mould itself. The key here is patience-let the vinegar solution do its work. This method aligns with the basic mould cleanup steps recommended by environmental health experts for safely handling mould.
First, spray the vinegar solution directly onto the mouldy area until it is damp, but not dripping. Avoid oversaturating the wall, as excess moisture can damage the plasterboard underneath. Let the solution sit for at least one hour. This gives the acetic acid in the vinegar time to penetrate and kill the mould roots. After an hour, use a soft brush or a damp cloth to gently scrub the surface mould away. Finally, wipe the area clean with a fresh cloth dipped in plain water.
Step 3: Dry the Area Thoroughly
Do not skip this final step. The most critical part of ensuring mould doesn’t return immediately is to eliminate all moisture. If you want to know how do you remove mold from walls for good, proper drying is the answer. Any lingering dampness creates the perfect environment for spores to regrow.
Start by using clean, dry cloths to wipe down the entire area, removing all surface moisture. To ensure the wall and the air are completely dry, point a fan directly at the cleaned spot for a few hours. For damp rooms like bathrooms or basements, running a dehumidifier is an excellent way to draw out any remaining moisture from the wall and the surrounding air.
Special Cases: How to Treat Drywall and Wallpaper
While cleaning mould from tiles or sealed surfaces can be straightforward, the approach changes entirely for porous materials like drywall and wallpaper. These surfaces don’t just host mould; they feed it, allowing the problem to grow deep within the material itself. This makes DIY methods ineffective and potentially dangerous, creating a much more complex problem than simply figuring out how do you remove mold from walls that are painted or sealed.
Attempting to scrub or paint over mould on these surfaces is a critical mistake. It ignores the root of the infestation and can worsen the spread of airborne spores, posing a significant health risk to your household.
Mould on Unpainted Drywall or Plasterboard
Unpainted drywall is particularly vulnerable. The paper facing is made of cellulose, which is a perfect food source for mould. When you see mould on the surface, its hyphae, or ‘roots’, have already penetrated deep into the gypsum core. Wiping the surface only removes the visible part, leaving the internal structure to regrow and continue causing damage. For this reason, the only truly effective and safe solution is to have the affected section professionally cut out and replaced. Trying to salvage it is a risk not worth taking.
Mould on or Under Wallpaper
Similar to drywall, both wallpaper and the adhesive used to apply it are organic materials that mould loves to consume. It is impossible to clean mould off wallpaper because the infestation is almost always within or behind it. The real danger lies in removal. Tearing off mould-infested wallpaper without proper containment procedures can release a massive cloud of toxic spores into your home’s air. Official sources like the EPA mold cleanup guidelines highlight the critical need for caution to prevent cross-contamination when dealing with extensive mould growth.
When you’re faced with these materials, the question isn’t just how do you remove mold from walls, but how to do it without compromising your property’s integrity or your family’s health. Due to the significant risks of airborne spores and incomplete removal, these situations demand expert attention. For any mould issues on drywall or wallpaper, it is essential to get a professional inspection. Our trained Mould Removalists can safely assess the damage and perform the necessary remediation to give you peace of mind.
Why Surface Cleaning Isn’t Enough: The Threat of Airborne Spores
You’ve seen the dark, ugly patch of mould on your wall and your first instinct is to scrub it away. But stop. Vigorously scrubbing or using harsh chemicals on a mould colony is one of the most common mistakes a homeowner can make. When you disturb visible mould, you cause it to release millions of microscopic spores into the air, turning a localised problem into a whole-house contamination risk.
This airborne threat is the hidden danger of a mould infestation. While you might remove the stain, you have unknowingly spread the seeds for new colonies and exposed your family to significant health risks. Standard DIY cleaning simply cannot address this invisible contamination.
The Mould Lifecycle: More Than Just a Stain
The mould you see on your wall is only the final stage of a much larger problem. Mould begins as a single spore that lands on a damp surface with a food source (like plasterboard or wood). It grows into a colony, called a mycelium, which often spreads inside the wall cavity, unseen. The visible patch is the “fruiting body,” designed for one purpose: to produce and release more spores to repeat the cycle. Killing this visible part doesn’t eliminate the spores already circulating in your air.
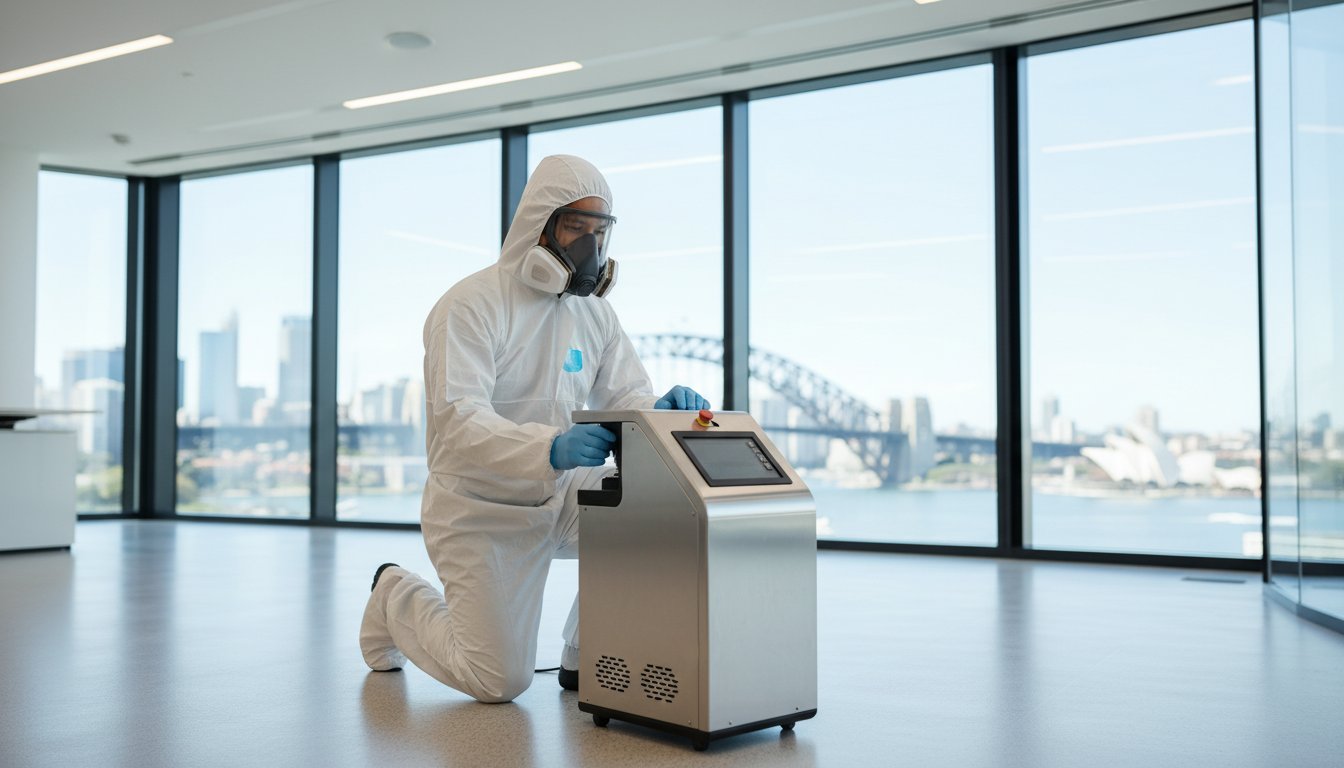
Professional Air Scrubbing and Fogging
So, how do you remove mold from walls and the air safely and completely? The answer is a two-part professional process that treats both the surface and the air. At Mould Removalist Sydney, we understand that true remediation means eliminating the threat you can’t see. Our approved master technicians use specialised equipment to ensure your home’s air is clean and safe to breathe.
This is achieved through two critical steps:
- Air Scrubbing: We use industrial-grade air scrubbers fitted with HEPA (High-Efficiency Particulate Air) filters. These machines draw in contaminated air, capturing spores as small as 0.3 microns with over 99.9% efficiency, effectively purifying the air in the affected room.
- The Goldmorr System Fogging: As part of our proven process, we use a specialised fogging treatment that performs non-mechanical air scrubbing. This safe, biodegradable fog permeates the entire space, neutralising airborne spores and surface mould it contacts, reaching areas that physical cleaning can’t.
Don’t just clean the stain; eliminate the threat. For a comprehensive solution that guarantees peace of mind, trust the experts. Contact a professional Mould Removalist to ensure your home is truly mould-free.
When to Call a Professional Mould Removalist
While DIY methods can be effective for minor surface mould, knowing your limits is crucial for protecting your health and your property. A small, visible patch can often be the tip of the iceberg, masking a much larger problem. When you’re dealing with a persistent or widespread issue, the question of how do you remove mold from walls safely and permanently is best answered by a certified professional. Don’t wait for a small problem to become a major infestation-acting quickly is key.
Red Flags: A Checklist for Calling for Help
If you notice any of the following signs, it’s time to put down the spray bottle and pick up the phone. These are clear indicators that the mould problem is beyond a simple surface clean and requires expert intervention.
- The size of the affected area: The mould patch is larger than a dinner plate (approximately 30cm in diameter).
- Rapid regrowth: The mould returns quickly and aggressively after you’ve cleaned the area. This signals an underlying moisture problem that hasn’t been addressed.
- A strong, musty odour: If you can smell mould but can’t see a large source, it is likely growing behind walls, under floors, or in your ceiling cavity.
- Porous surfaces are affected: Mould has penetrated porous materials like plasterboard, wood, or insulation, making it impossible to remove completely with surface cleaning.
The Benefits of a Professional Service
Hiring a professional Mould Removalist isn’t just about cleaning; it’s about comprehensive remediation. Our trained technicians provide peace of mind by delivering an effective, long-term solution that DIY methods simply cannot match. A professional understands exactly how do you remove mold from walls without risking cross-contamination or leaving hidden spores behind.
- Expert Containment and Safety: We use specialised containment procedures to isolate the affected area, preventing airborne spores from spreading to other parts of your home during removal.
- Advanced Remediation Techniques: Our team utilises industry-leading equipment, including air scrubbers with HEPA filters and specialised fogging systems, to eliminate both visible mould and invisible airborne spores.
- Guaranteed, Lasting Results: We don’t just treat the symptom; we find and help you address the root cause of the moisture. This ensures the mould does not return, protecting your property for the long term.
Worried about your mould problem? Take the first step towards a healthier home. Get a free, no-obligation quote now.
Don’t Just Clean Mould – Eliminate It for Good
Tackling mould on your walls can seem straightforward, but as we’ve covered, true remediation goes far beyond a simple surface scrub. The most critical takeaways are to always prioritise safety and to understand that visible mould is often just a symptom of a deeper issue, like hidden moisture and dangerous airborne spores. While this guide provides the essential steps for how do you remove mold from walls in minor cases, the most effective and lasting solution addresses the problem at its source.
For a truly reliable and safe solution, trust Sydney’s expert Mould Removalists. As approved technicians for the advanced Goldmorr System, we don’t just clean mould; we provide complete remediation and air purification. We are so confident in our professional service that we promise to beat any written quote by 10%. It’s that simple.
Don’t wait until the problem worsens. Take the definitive step towards a clean, safe, and healthy home environment. Don’t risk your health. Schedule a professional mould inspection today!
Frequently Asked Questions About Mould Removal
What is the difference between mould and mildew?
Mildew is a specific type of mould that tends to grow on flat, moist surfaces. You’ll often see it as a powdery, grey or white patch. Mould, on the other hand, can be fuzzy or slimy and appears in various colours like green or black. While they look different, both are fungi that thrive in damp conditions and indicate a moisture problem that requires immediate attention. Both can damage your property and affect your health if left untreated.
Is black mould on walls dangerous to my health?
Yes, certain types of black mould can be a serious health risk. Species like Stachybotrys chartarum can release mycotoxins, which are toxic compounds that may cause respiratory problems, allergic reactions, headaches, and other significant health issues, especially in children and the elderly. Don’t wait until the problem worsens. For your safety, any significant mould growth should be assessed and handled by a trained professional to prevent the spread of harmful airborne spores throughout your home.
Can I just paint over the mould on my walls?
No, you should never just paint over mould. This is a common mistake that only hides the problem temporarily. The mould is a living organism that will continue to grow and feed on the wall materials underneath the paint. It will eventually reappear on the surface, often worse than before. To solve the issue permanently, the mould must be completely killed and removed, and the underlying moisture source must be fixed. It’s that simple.
How much does professional mould removal cost in Sydney?
The cost of professional mould remediation in Sydney varies depending on the scale of the problem. A small, contained area might cost between A$500 and A$800. For more extensive infestations covering multiple rooms, you could expect to pay anywhere from A$1,500 to A$5,000 or more. The final price depends on the size of the affected area, the type of surface, and the accessibility. Always get a detailed written quote from a certified Mould Removalist.
What’s the best way to prevent mould from growing on my walls in the first place?
Prevention is all about controlling moisture. The most effective strategy is to ensure proper ventilation, especially in wet areas like bathrooms and laundries, by using exhaust fans. Promptly fix any leaks from pipes, roofs, or windows. Try to keep indoor humidity levels below 50%. Wiping down condensation from windows and walls also helps. While knowing how do you remove mold from walls is useful, stopping it before it starts is the most reliable and affordable solution.
Does using a dehumidifier help get rid of mould?
A dehumidifier is a powerful tool for prevention, but it does not kill or remove existing mould. Mould needs moisture to grow, and a dehumidifier works by pulling excess moisture from the air. This creates an environment that is hostile to new mould growth. It is an essential step to use after a professional mould remediation to ensure the problem doesn’t return, but it won’t solve an active infestation on its own.