Discovering mould in your home brings immediate worry. Is it dangerous? How do you get rid of it for good? The uncertainty surrounding professional treatment can add to the stress. Many property owners are confused by technical terms and fear that the problem will return even after paying for a service. This is where a clear understanding of the professional mould remediation process step by step provides true peace of mind and restores your confidence.
For a detailed breakdown of how professionals investigate these issues, you can learn more about Mould Testing & Removal, which often forms the first step of any successful remediation plan.
Don’t wait until the problem worsens-because it will. In this expert guide, we pull back the curtain on how certified technicians tackle a serious mould infestation. You will learn exactly how we inspect the damage, contain the spread of airborne spores, safely eliminate all traces of contamination, and verify that your property is clean and safe. Forget the guesswork and gain the confidence that comes from knowing the job will be done right, the first time.
Step 1: Inspection & Assessment – Identifying the Full Scope of the Problem
A successful outcome hinges on a precise and thorough initial diagnosis. Simply cleaning visible mould is a temporary fix that ignores the underlying cause. The first stage in our professional mould remediation process step by step is a comprehensive assessment designed to understand the source, type, and full extent of the contamination. This critical first step ensures we develop an effective, long-term solution, not just a cosmetic cover-up.
Initial Contact and Information Gathering
Our process begins the moment you contact us. We listen carefully to your observations-what you see, what you smell, and any health concerns you may have. To expedite the process, we may ask you to send photos of the visible mould. This initial information helps us understand your situation so we can schedule a convenient time for a certified technician to conduct a full on-site inspection.
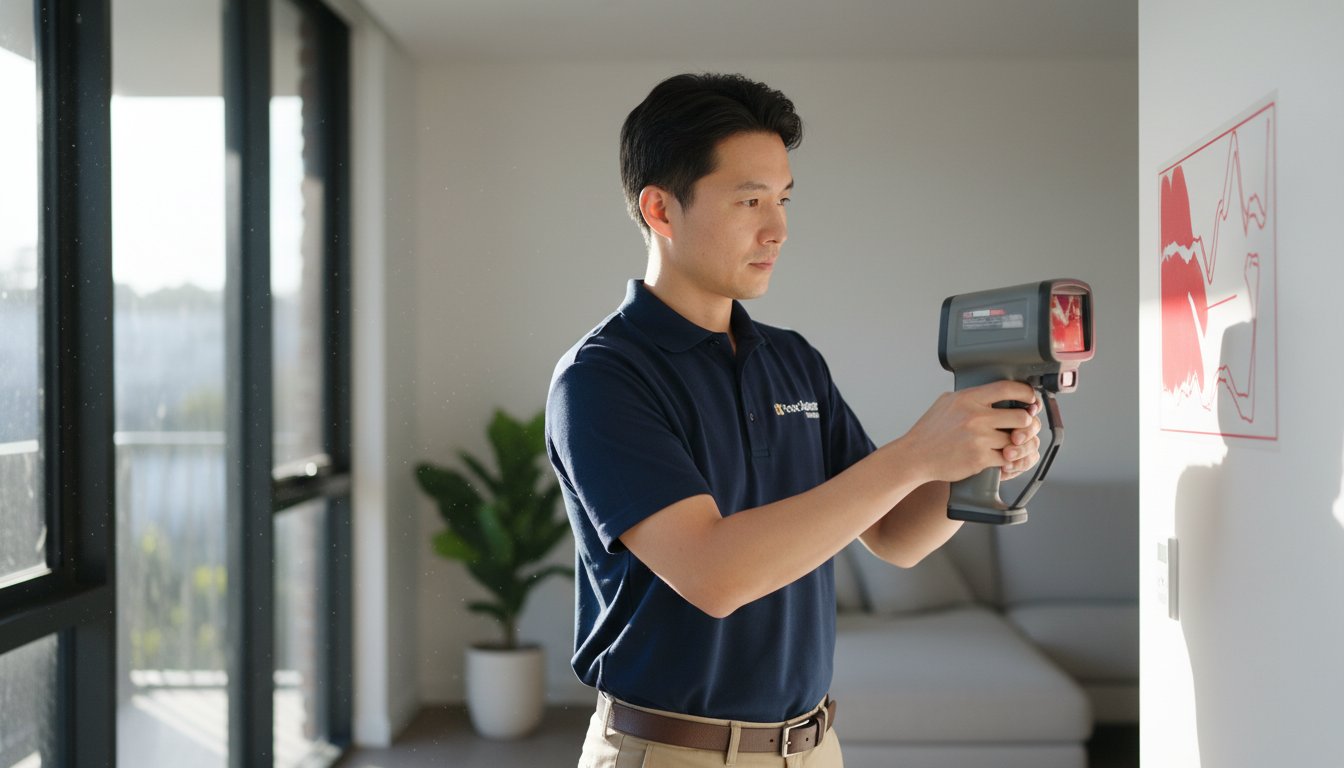
The On-Site Professional Mould Inspection
Our trained technicians conduct a meticulous visual assessment of your property, but our investigation goes much deeper than what the eye can see. We use specialised, non-invasive technology to uncover the complete picture:
- Moisture Meters: To detect hidden water content within walls, floors, and ceilings.
- Thermal Imaging Cameras: To identify temperature anomalies that can indicate hidden leaks or persistent damp spots.
Identifying the moisture source is paramount. Indoor mould cannot thrive without moisture, so pinpointing and addressing the source-whether it’s a plumbing leak, condensation, or water ingress-is the key to preventing its return.
Developing the Remediation Plan
Based on our comprehensive findings, we create a tailored remediation plan. This isn’t a one-size-fits-all approach; it’s a specific strategy for your property. You will receive a detailed, transparent quote with a clear breakdown of the work required-no hidden fees, no surprises. We will walk you through our proposed mould remediation process step by step, answer all your questions, and ensure you have complete peace of mind before any work begins.
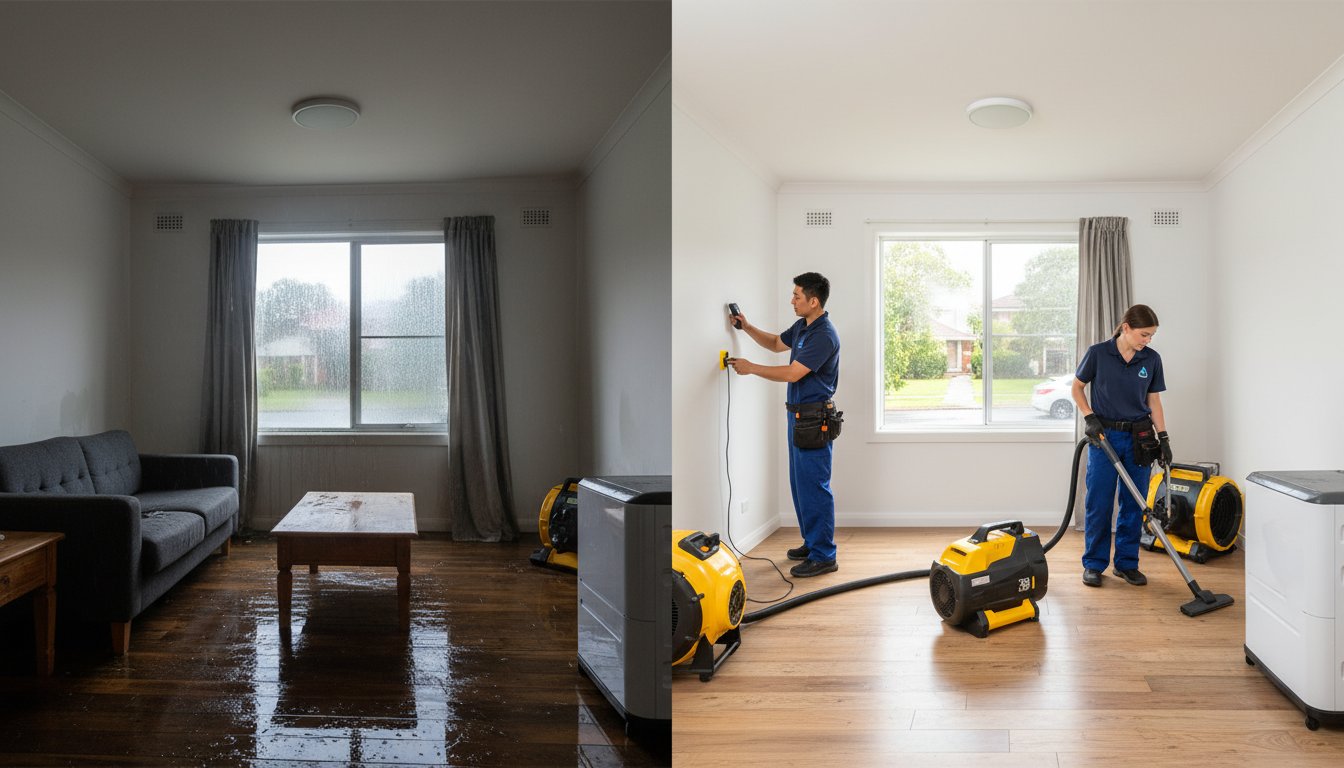
Step 2: Containment & Air Filtration – Protecting Your Property
Once the source of the mould has been identified, the next critical phase begins. This is where professional expertise truly shines and is a step almost always missed in DIY attempts. The primary goal is simple but crucial: prevent microscopic mould spores from spreading to unaffected areas of your property. Disturbing a mould colony without proper containment can release millions of spores into the air, turning a localised problem into a whole-house contamination nightmare. Our certified technicians ensure this never happens.
This phase is not just about cleaning; it’s about control. By isolating the work area, we create a safe, contained environment that protects your family, your pets, and the rest of your home throughout the entire removal process. It is a non-negotiable part of a safe and effective mould remediation process step by step.
Setting Up Critical Containment Barriers
Our first action is to construct a physical barrier. Using heavy-duty, 6-mil plastic sheeting, our team meticulously seals off the contaminated area. This involves creating a fully enclosed chamber by covering doorways, windows, and any HVAC vents or returns. This critical seal ensures that no airborne dust or mould spores can escape the work zone, effectively quarantining the problem and preventing cross-contamination.
Deploying Negative Air Machines and HEPA Filters
With the physical barrier in place, we establish a controlled environment using advanced air filtration technology. We deploy powerful air scrubbing machines fitted with High-Efficiency Particulate Air (HEPA) filters. These units create negative air pressure within the containment zone, which means air is constantly being drawn into the work area, not flowing out. This controlled airflow is a fundamental principle of safe remediation, as detailed in guidelines like the EPA’s guide to mould remediation. Any airborne spores disturbed during the removal are immediately captured by the HEPA filters, which are certified to trap 99.97% of particles as small as 0.3 microns-far smaller than the naked eye can see. This meticulous approach to air management is what guarantees the rest of your property remains pristine.
Step 3: The Removal Phase – Eliminating Mould at the Source
With the containment area secure, our certified technicians begin the most critical hands-on stage of the mould remediation process step by step: the physical removal of mould colonies. This is not a simple cleaning job; it is a meticulous process designed to eliminate the contamination at its source and ensure it does not return. We address both the visible mould growth and, crucially, the underlying moisture problem that allowed it to thrive in the first place.
Removing Contaminated Materials
Mould can deeply penetrate porous materials, making them impossible to salvage. Items like contaminated drywall, insulation, and carpet must be removed to eradicate the problem completely. Our team carefully cuts away and removes these materials, sealing them in thick, 6-mil disposal bags inside the containment zone. This strict protocol prevents the cross-contamination of your property by ensuring airborne spores are not released during disposal.
Cleaning and Treating Surfaces
For non-porous or semi-porous surfaces like timber framing, concrete, and other structural elements, we apply specialised, industry-approved antimicrobial cleaning agents. These are not simple store-bought chemicals. Our solutions are designed to kill mould at a microbial level and inhibit future growth. We meticulously clean, scrub, and wipe down all affected surfaces. It is vital to understand that simply painting or spraying over mould is ineffective and dangerous; it traps the mould, allowing it to continue damaging your property and impacting your health. The goal is complete removal, not concealment, to mitigate the health concerns outlined in the CDC information on mould.
Addressing the Moisture Source
This is the single most important step to guarantee a long-term solution. Removing mould without fixing the water issue is a pointless exercise-the mould will inevitably return. Our technicians work to ensure the original moisture source, whether it’s a plumbing leak, condensation issue, or waterproofing failure, is fully resolved. We provide clear, expert recommendations for necessary repairs or improvements, such as enhancing ventilation, to protect your property from future mould invasions. Your peace of mind depends on a dry, healthy environment.
Have a persistent leak or water ingress issue? Ask about our water damage services.

Step 4: Air Purification & Decontamination – Targeting Invisible Airborne Spores
Many people believe that simply cleaning the visible mould from a surface solves the problem. This is a dangerous misconception. Removing the visible growth is only half the battle. The real, persistent threat lies in what you can’t see: millions of microscopic airborne spores released by the mould colony. These invisible particles can trigger health issues and, if left untreated, will find a new place to land and start the infestation all over again.
This is why air purification is a non-negotiable part of our professional mould remediation process step by step. We don’t just clean; we decontaminate your entire indoor environment to ensure the problem is gone for good.
What Are Airborne Mould Spores?
Mould reproduces by releasing tiny, lightweight spores into the air. Think of them as microscopic seeds. They float on air currents, settling on any available surface. If conditions are right (a little moisture is all it takes), they will germinate and create a new mould colony. Inhaling these spores is also a significant health concern, often leading to respiratory issues, allergic reactions, and other serious health problems. Don’t wait for the problem to worsen-because it will.
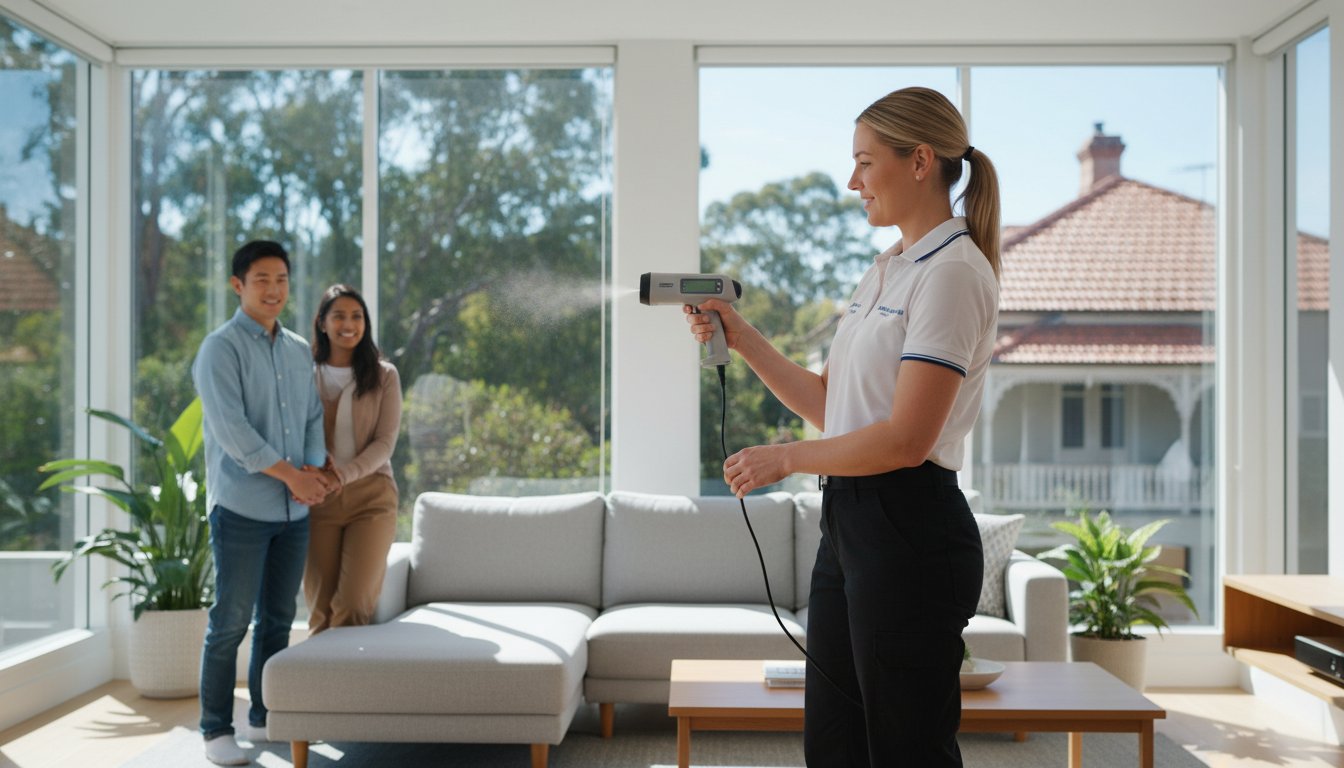
The Goldmorr System Fogging Process
To combat this invisible threat, our certified technicians use the industry-leading Goldmorr System. This is the signature step that sets our service apart. We use a specialised fogging machine to disperse a fine, non-toxic, and biodegradable mist throughout the affected area. This is not just a spray; it’s a comprehensive air treatment.
This powerful process offers complete peace of mind because it:
- Permeates Everywhere: The ultra-fine mist penetrates every crack, crevice, and hard-to-reach space that sprays and wipes can’t.
- Eliminates Spores on Contact: The fogging agent actively neutralises airborne spores, killing them before they can land and re-infest your property.
- Treats Surfaces: It also eliminates any remaining mould particles on surfaces it comes into contact with, providing a final, thorough clean.
- Is Completely Safe: The formula is safe for your family, pets, and the environment, leaving no harmful residues behind.
By addressing both visible mould and airborne spores, this crucial stage in our mould remediation process step by step ensures a truly healthy and safe indoor environment. To learn more about our advanced techniques, contact our expert team today.
Step 5: Post-Remediation – Final Cleaning, Verification & Prevention
Our job isn’t finished once the visible mould is gone. A truly professional service from ABC Mould Cleaning Solutions ensures your property is not just mould-free, but also clean, safe, and ready for you to use without worry. This final stage is a critical part of the mould remediation process step by step, designed to provide you with complete peace of mind and the tools to prevent future outbreaks.
We don’t just solve the immediate problem; we deliver a lasting solution that restores the health of your home or workplace.
Final Detailed Cleaning
To ensure no microscopic threats are left behind, our technicians perform a meticulous final clean. First, all surfaces within the containment zone-including walls, floors, and fixtures-are thoroughly vacuumed using industrial-grade HEPA (High-Efficiency Particulate Air) filters. This is vital as it captures even the smallest airborne spores that may have settled during the removal process. Following this, we wipe down all hard surfaces to leave the area sanitised and spotless.
Post-Remediation Verification
Confidence in our work is paramount. Before we consider the job complete, we conduct a final verification. This involves a comprehensive visual inspection to confirm every trace of visible mould has been eradicated. Our technicians may use moisture meters again to verify that the affected building materials have returned to normal, dry levels. Only when we are 100% satisfied with the result do we carefully dismantle and remove all containment barriers, ensuring a clean transition back to your normal living space.
Final Report and Prevention Advice
Empowering you to maintain a mould-free environment is our ultimate goal. You will receive a detailed report outlining the work we performed, the areas treated, and the results achieved. More importantly, we provide you with expert, practical advice tailored to your property to prevent mould from returning. This may include:
- Ventilation improvements: Simple strategies for kitchens, bathrooms, and laundries.
- Humidity control: Tips on using dehumidifiers or managing sources of indoor moisture.
- Structural solutions: Recommendations for issues like subfloor ventilation or fixing minor leaks.
This final step in the mould remediation process ensures you are equipped for the future. Worried about mould returning? Get your free prevention quote today.
Your Expert Partner in Mould Remediation
Effective mould removal is far more than just surface cleaning; it is a comprehensive, scientific approach designed to protect your property and your health. Understanding the professional mould remediation process step by step-from meticulous inspection and containment to complete spore removal and air purification-reveals why expert intervention is crucial. DIY methods often miss the hidden moisture source and airborne spores, allowing the problem to quickly return.
Don’t let mould compromise your home and well-being. As certified Goldmorr System Technicians, we provide a permanent solution that is safe for people, pets, and the environment. We are so confident in our results and pricing that we promise to beat any written quote by 10%. Take back control of your environment and restore your peace of mind. The first step is simple and free.
Don’t Wait for Mould to Spread. Send Us Photos for a Free, No-Obligation Quote!
Frequently Asked Questions About Mould Remediation
How long does the mould remediation process take?
The duration depends on the extent of the mould growth, the size of the affected area, and the underlying moisture issue. A standard treatment for a single room might take a few hours. A more significant infestation affecting multiple areas could take 1-3 days. Our certified technicians work efficiently to minimise disruption and restore your property to a safe condition as quickly as possible. We provide a clear timeline after our initial, expert assessment of the problem.
Is the mould remediation process safe for my family and pets?
Absolutely. Your family’s safety is our top priority. We use the industry-leading Goldmorr System, which involves biodegradable, non-toxic products that are safe for people, pets, and the environment. While we may ask you to stay out of the immediate treatment area for a short period, our process is designed to be minimally invasive. We ensure the area is completely safe and the air quality is restored before we consider the job complete, giving you total peace of mind.
Can I stay in my house during the mould remediation process?
In most cases, yes. For smaller, localised treatments, you can typically remain in your home but should avoid the immediate work area. For more extensive remediation involving multiple rooms or significant containment, we may recommend you make temporary arrangements for a day or two to ensure your absolute safety and comfort. Our certified technicians will assess your specific situation and provide a clear, professional recommendation before any work begins. It’s that simple.
What is the difference between mould removal and mould remediation?
Mould removal is just cleaning the visible mould, which is often a temporary fix. Mould remediation is a comprehensive, scientific process. Our mould remediation process step by step involves not only removing mould but also fixing the moisture source. It includes containment to prevent cross-contamination and air scrubbing to eliminate airborne spores. It’s a complete solution designed to prevent mould from returning, not just a surface-level clean that leaves the underlying problem unsolved.
Why can’t I just use bleach to kill the mould myself?
Bleach is not an effective long-term solution. While it might remove the surface colour, it doesn’t kill the mould’s root structure on porous materials like drywall or wood. In fact, the water in bleach can feed the underlying mould, causing it to grow back stronger. Professional remediation uses specialised, industry-approved products that eliminate mould at its source and address the airborne spores that bleach leaves behind. Don’t wait until the problem worsens-because it will.
How much does professional mould remediation cost in Sydney?
The cost of mould remediation in Sydney varies depending on the job’s size and complexity. A small, straightforward job might start from A$500 – A$1,500. Larger projects with extensive contamination or structural involvement can cost several thousand dollars. The best way to get an accurate price is to get a professional assessment. Send us images of your mould issue for a fast, affordable quote. We are so confident in our pricing that we will beat any written quote by 10%.