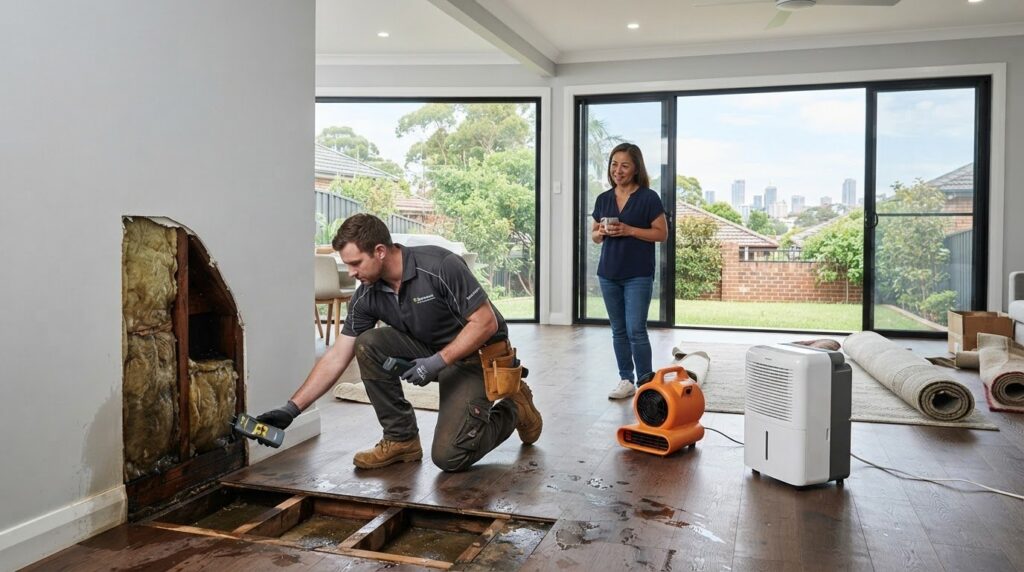
The first 48 hours matter: mould can begin growing on flood-damp materials within 24-48 hours, so remove moisture as soon as it’s safe. Effective post-flood structural drying and mould prevention means more than drying what you can see: hidden moisture in walls, floors and subfloors can keep the risk alive. Small, contained patches on non-porous surfaces such as tiles or glass may be manageable, but extensive mould, contaminated floodwater or damp hidden materials call for professional assessment.
It’s understandable to want to clean up quickly and handle what you can yourself. This guide explains how to start drying safely, which materials may need removal, how to prevent mould returning, and when a professional assessment is the safer next step.
You’ll also learn why ventilation matters after the immediate clean-up: removing damp air and improving airflow can help reduce the conditions that allow mould to recur. Use these steps to make informed decisions as you work through flood damage, without mistaking a dry-looking surface for a fully dry structure.
Key Takeaways
- Start drying as soon as the property is safe to enter, and check beyond visible surfaces for moisture trapped in walls, floors and subfloors.
- Use moisture readings to track drying progress; a surface that feels dry may conceal damp materials beneath it.
- Small patches on non-porous surfaces may be suitable for careful DIY cleaning, while extensive growth or contaminated floodwater calls for professional assessment.
- Remove porous materials that can’t be dried effectively, and avoid covering or repairing flood-damaged areas while they remain damp.
- Improve airflow and manage indoor humidity after clean-up to help reduce the conditions that allow mould to return.
How do you prevent mould during flood restoration?
Start drying as soon as the property is safe to enter, then check moisture beyond visible surfaces. A structured process combines moisture checks, targeted drying and recorded readings before repairs begin.
-
Assess Moisture and Mould Conditions
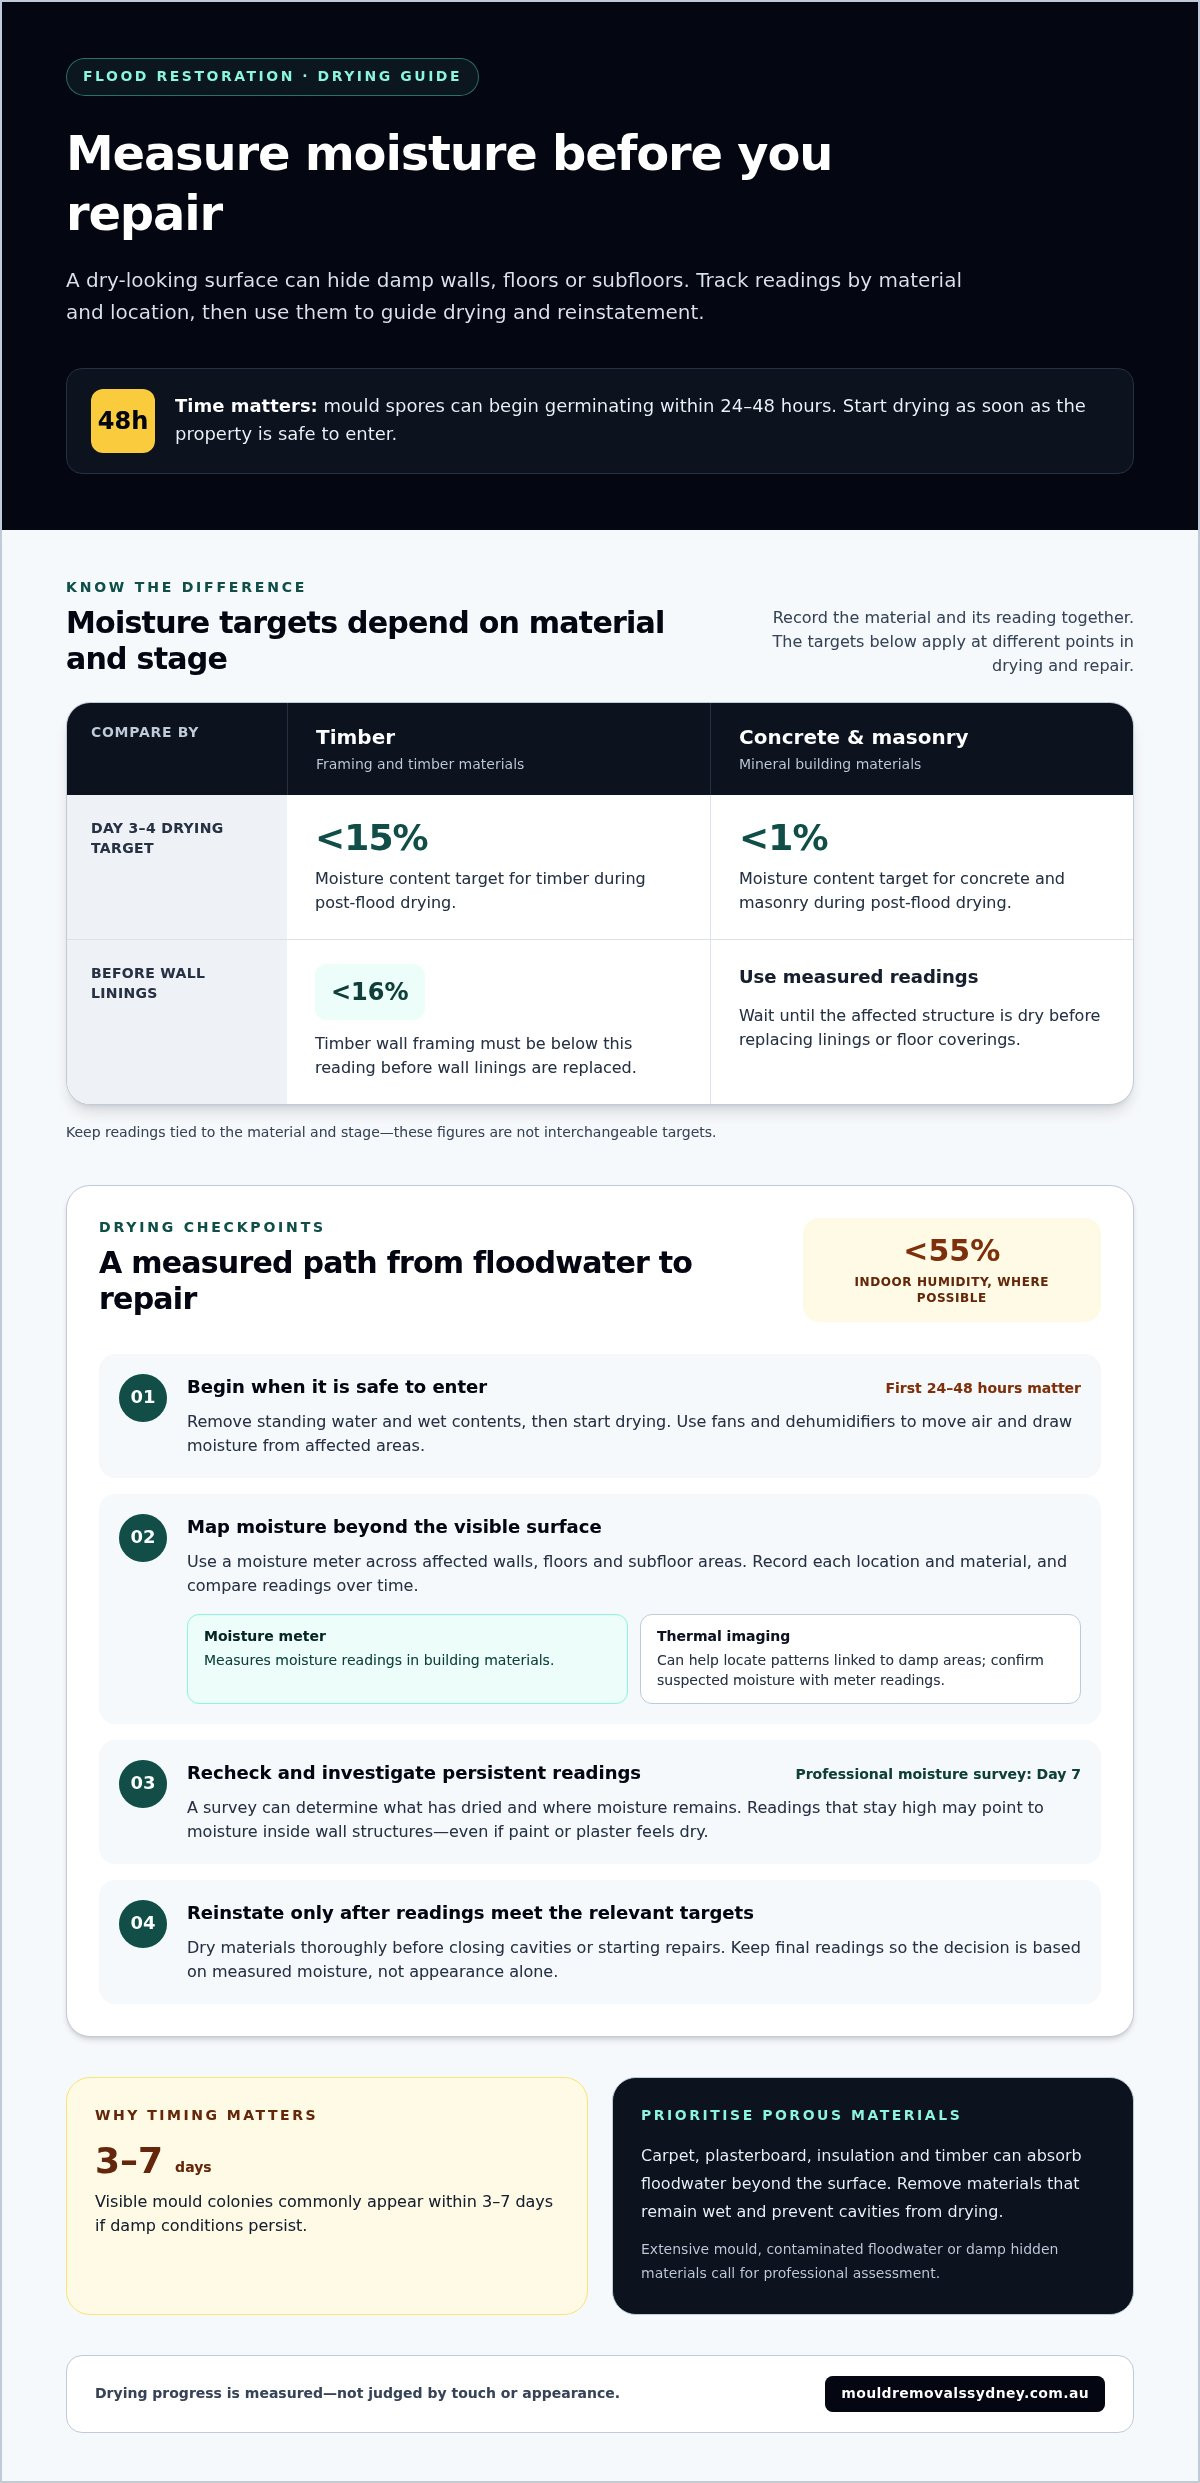
Check flood-affected rooms, furniture and stored items for dampness, staining and musty odours, then identify materials that hold moisture. Mould spores can begin germinating within 24 to 48 hours; visible colonies commonly appear within 3 to 7 days if damp conditions persist. Keep indoor humidity below 55% where possible, and don’t assume a dry surface means the wall or floor beneath it is dry.
-
Map and Detect Moisture
Use a moisture meter to take readings across affected walls, floors and subfloor areas, recording each location and material. Professional moisture mapping can show how far water has travelled and identify areas needing further drying. Thermal imaging can help locate temperature patterns linked to damp areas, but confirm suspected moisture with meter readings. An image alone doesn’t measure water content inside building materials.
-
Reinstate After Readings Meet Targets
Wait until readings show the affected structure has dried before replacing linings or floor coverings. During post-flood drying, the guide’s targets for Day 3-4 are below 15% moisture content for timber and below 1% for concrete and masonry. Timber wall framing must be below 16% before wall linings are replaced. These targets apply to different materials and stages, so record the material and reading together.
- Prioritise porous materials because carpet, plasterboard, insulation and timber can absorb floodwater beyond the surface. Remove materials that remain wet and prevent wall cavities from drying; trapped moisture can sustain mould growth even after a room looks clean. Photograph affected areas and keep dated moisture readings with relevant insurance paperwork before removing damaged materials.
- Track drying instead of relying on touch. Take and record moisture readings at consistent locations, comparing results over time to spot areas that aren’t improving. Arrange a professional moisture survey on Day 7 after flooding to determine what has dried and where moisture remains. Readings that stay high can point to moisture inside wall structures, even when paint or plaster feels dry.
- Dry materials thoroughly before closing cavities or starting repairs. If timber remains damp, or concrete still shows moisture, delay reinstatement and continue targeted drying. Premature repairs can lead to finish movement, cracking, poor adhesion and floor-covering problems. Keep records of final readings so the decision to reinstate is based on measured moisture, not appearance alone.
Can I clean mould myself after water damage?
After a flood, photograph damage, notify your insurer within 24 hours, and begin clean-up once it’s safe to re-enter. Mould can start growing within 24 to 48 hours, so remove water and wet materials promptly.
-
Remove Standing Floodwater
Remove standing water with a pump or buckets as soon as the property is safe to enter. Clear flood debris from floors so drying can begin, and take care around electrical hazards or unstable areas. Wear gloves, a mask and rubber boots when handling flood-affected spaces. Photograph rooms and damaged contents before moving or disposing of them, and retain the images with your insurance records.
-
Dispose of Wet Contents
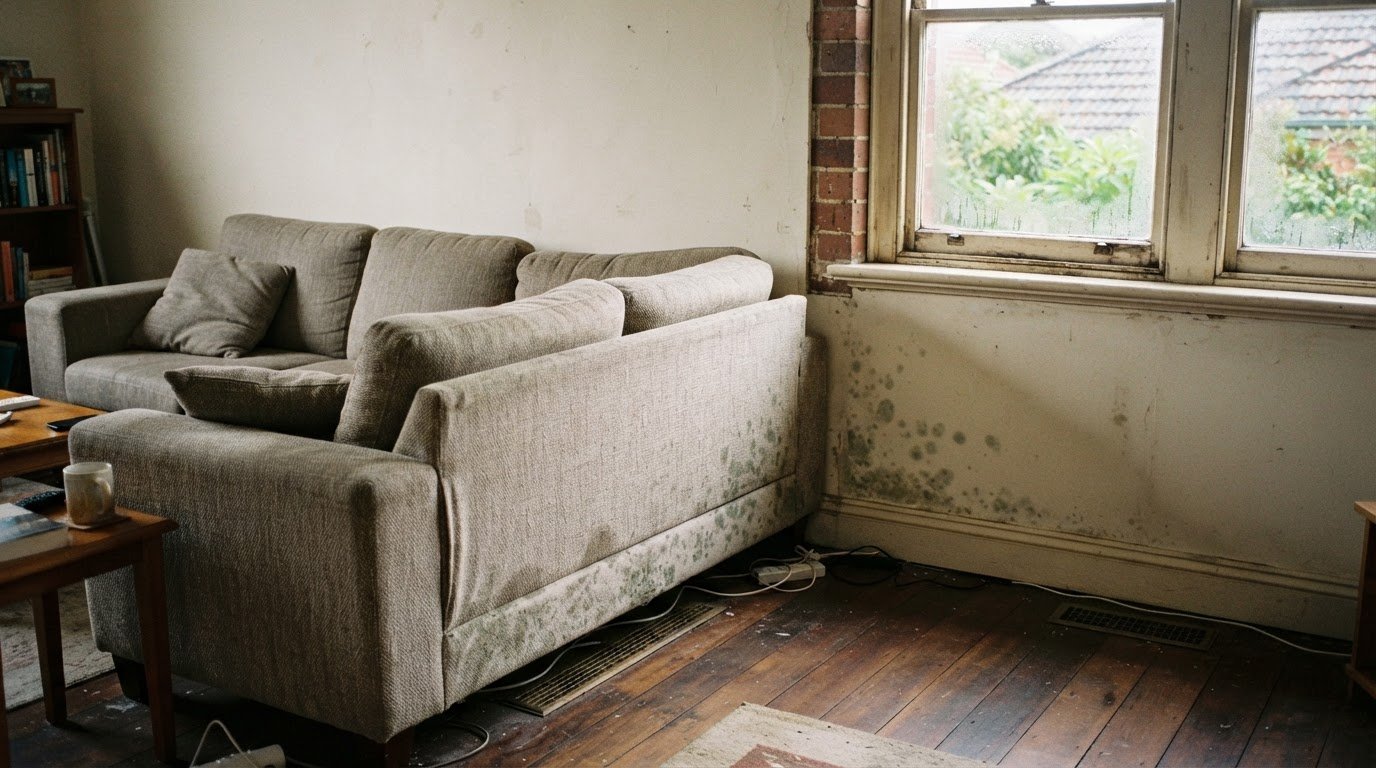
Move soaked contents out of affected rooms and separate items that can be dried from those that cannot be cleaned effectively. Waterlogged carpets, underlay, curtains and insulation can hold moisture; remove them if they can’t be dried within 48 hours. Dispose of mattresses, upholstered furniture and ceiling tiles that can’t be cleaned effectively. Follow your insurer’s policies for documenting and disposing of damaged belongings.
Australian insurance policies commonly set a 30-day reporting deadline, while some allow only 14 days. Notify your insurer within 24 hours where possible, and check your policy’s reporting and evidence requirements.
-
Remove Contaminated Porous Materials
Remove porous materials that absorbed floodwater and cannot be thoroughly dried, especially if the water may contain sewage or other contamination. Carpet, underlay, wet insulation and plasterboard can retain moisture within fibres or wall cavities, beyond the reach of surface cleaning. Don’t assume visibly clean material is safe simply because it looks dry. Contaminated water or extensive mould calls for professional assessment rather than DIY surface cleaning.
ANSI/IICRC S500 provides a technical reference for water-damage restoration and drying; it isn’t a replacement for your insurer’s policy instructions. Keep photographs, item records and removal notes together for your claim.
-
Begin Urgent Structural Drying
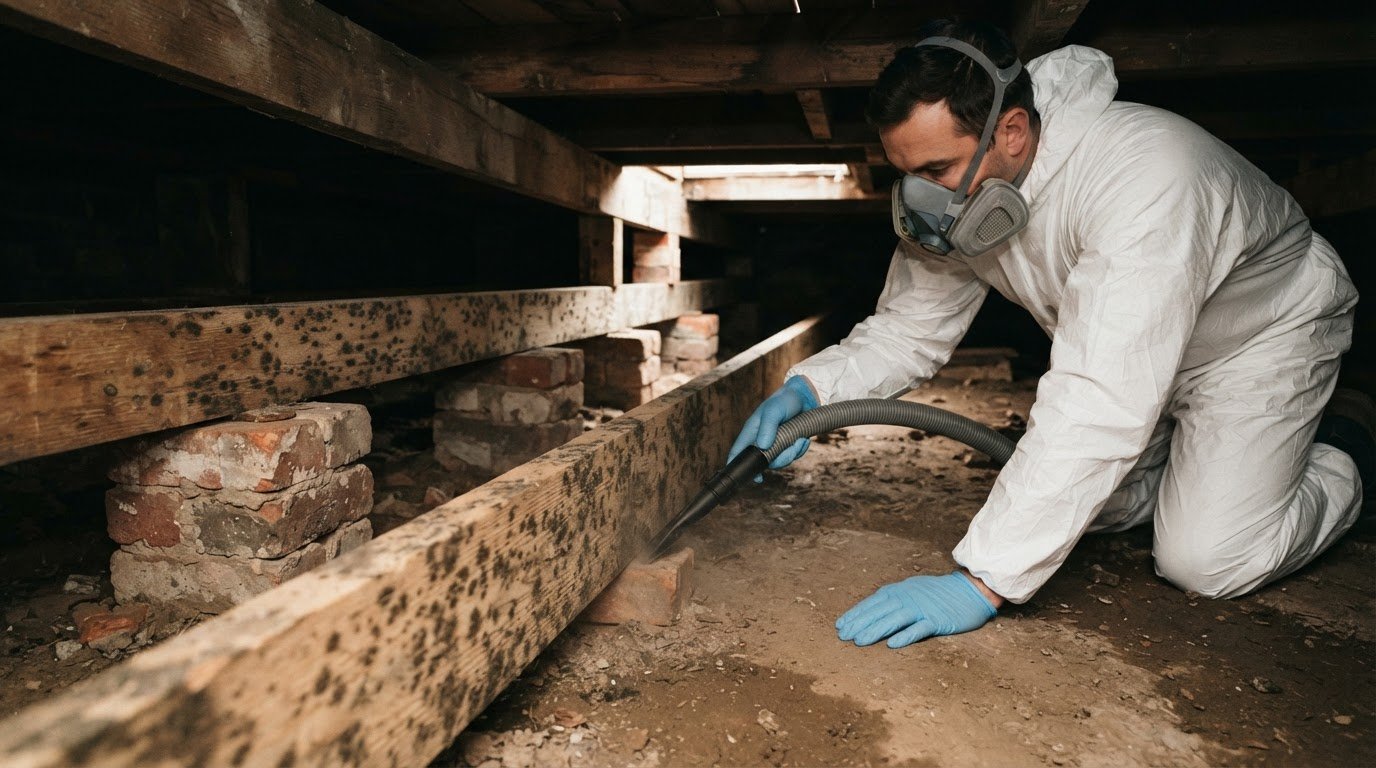
Start drying the structure after removing standing water and damaged contents. Mould spores can begin germinating within 24 to 48 hours, so don’t wait for visible growth before acting. Use fans and dehumidifiers to move air and draw moisture from floors, walls and remaining contents. Check hidden areas, including wall cavities and beneath floor coverings, because porous building materials can stay damp after exposed surfaces appear dry.
Keep monitoring affected materials as they dry. If dampness persists or contamination extends into structural areas, stop DIY removal and arrange a professional assessment. Drying thoroughly before repairs helps prevent moisture from being trapped behind new linings or finishes.
Professional water damage assessment and remediation
Arrange a professional assessment when floodwater has affected hidden structures, contaminated materials or extensive areas. A systematic inspection can identify what needs removal, cleaning and drying before repairs begin.
- Arrange an assessment as soon as the property is safe, ideally within 48 to 72 hours after floodwaters recede. Prioritise this if water has entered wall cavities, subfloors or ductwork, where moisture can remain out of sight. In Northern Rivers properties, professional assessment is recommended when inundation exceeds 500 mm. Also seek help if damage affects more than 20% of the floor area.
- Have affected materials and rooms assessed, not just visibly mouldy surfaces. A professional moisture survey can identify damp floors, wall framing and concealed areas that need targeted drying. This matters because mould can spread beyond the original flood-affected area, including through cavities and ductwork, within two weeks. Record which areas remain damp and what work is needed before reinstatement.
- Use professional remediation for extensive mould growth or contamination from sewage or other contaminated floodwater. A small patch on a hard, non-porous surface is different from mould across porous materials or inside a wall. Don’t dry-brush mould, as this can disperse spores into the air. Remediation should address affected areas and allow for appropriate drying and cleaning, rather than masking visible growth.
- Discuss air filtration as part of remediation when airborne particles are a concern. HEPA air filtration equipment captures particles as small as 0.3 microns during restoration. Filtration supports the work, but it doesn’t replace removing damaged materials or addressing moisture at its source. Flood-damaged air conditioning or central heating should remain off if contamination is suspected, until it’s cleaned and checked by a qualified person.
- Have damaged wall linings assessed before removal or replacement. Professional remediation teams may remove drywall to at least 30 centimetres above the highest water mark, allowing affected material to be addressed beyond the visible line. The required work depends on the water’s reach and the materials involved. Keep photographs and a record of assessment findings, drying progress and completed cleaning for your insurance documentation.
- Use the assessment findings to guide reinstatement. Repairing wet structures too early can trap moisture behind new linings and finishes, while floors may remain damp beneath coverings. Confirm that drying is complete before repairs start, and retain final moisture readings with your records. If mould extends into concealed spaces or contaminated materials, professional remediation is safer than further DIY cleaning.
Can I handle mould cleanup myself, or do I need a professional?
Fans and dehumidifiers support drying, but they don’t remove every hidden moisture source. Use them alongside ventilation, humidity checks and clear safety limits.
-
Improve Ventilation
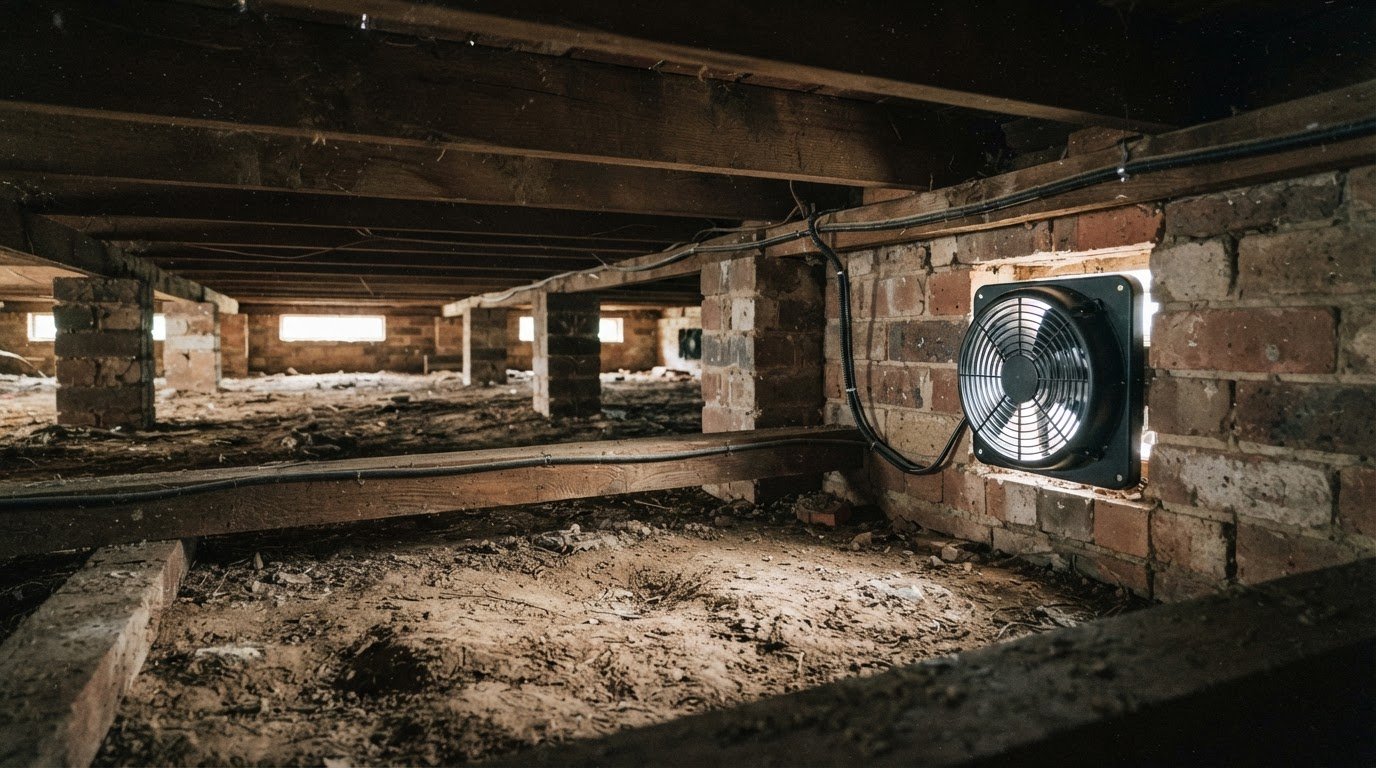
Increase airflow through flood-affected rooms while drying equipment runs. Ventilation helps carry warm, moisture-laden air outside instead of letting it settle on cooler surfaces. Make sure air can move around damp floors, furniture and room corners, not just through the centre of the room. Avoid excessive heat, which can warp or split wood, and ventilate heated spaces to release moist air.
-
Use Fans and Dehumidifiers
Position fans or air movers to move air across wet surfaces, then use dehumidifiers to remove moisture from indoor air. Aim airflow at damp floors and walls, not directly at visible mould, which can disperse spores. Keep equipment clear of standing water and position it so air can circulate around remaining furniture. Reposition units as drying progresses, including near damp areas that were previously blocked.
-
Monitor Humidity and Dehumidify
Use a hygrometer to track indoor relative humidity, and continue dehumidifying until it falls below 60%. Check the reading regularly, because one low result doesn’t show whether humidity will stay down. Daily moisture monitoring can help locate hidden damp spots and show whether drying equipment needs repositioning. If humidity remains high or materials stay damp, investigate the moisture source instead of relying on longer equipment run times alone.
- Keep drying equipment running 24 hours a day during Days 3-4 of recovery, and monitor its effect on damp areas. Check for changes in surface moisture and humidity rather than judging progress by touch alone. If readings stop improving, airflow may not be reaching a concealed cavity, or water may remain under flooring. Adjust equipment placement and keep a record of readings to track the drying pattern.
- Choose DIY mould cleaning only for a small, contained area on a suitable surface. Homeowners can usually manage areas smaller than 10 square feet; extensive growth needs professional assessment. People with immunocompromise or respiratory disease shouldn’t clean mould themselves. Stop if mould appears in hidden spaces, affects multiple rooms, or returns despite drying. Fans and dehumidifiers help control moisture, but they don’t replace specialist assessment when the affected area is extensive.
Ventilation improvements to prevent mould recurrence
Drying removes existing moisture; ventilation helps stop damp air lingering in rooms and concealed spaces. Use these steps after flood clean-up to support ongoing drying and reduce conditions that encourage mould growth.
- Match window opening to the weather. In dry weather, open windows and doors to improve airflow through affected rooms. In wet weather, leave them ajar for ventilation without drawing more damp outdoor air inside. When conditions allow, create an airflow path between openings on opposite sides of a room. Keep internal doors open so air can move between adjoining spaces.
- Check the airflow path, not just the window position. Open windows won’t ventilate a space effectively if furniture, closed internal doors or stored belongings block circulation. Move items away from damp walls and keep pathways clear around corners, wardrobes and other enclosed spaces. Inspect these areas for condensation or musty odours, then adjust openings to help air reach them.
- Keep ventilation working alongside moisture removal. Airflow can carry damp air out, but it doesn’t extract water held inside timber, plasterboard or other porous materials. Use dehumidification where indoor moisture remains high, and monitor affected areas instead of relying on open windows alone. Mould can begin growing within 24 to 48 hours if flood moisture remains, so ventilation must support prompt structural drying.
- Review ventilation after the initial drying period. Check rooms, cupboards, wall edges and subfloor spaces for persistent dampness or returning mould growth. A clean-looking surface doesn’t prove concealed materials have dried. If musty smells return or readings remain high, investigate the source rather than simply increasing airflow. A professional inspection can help identify moisture or mould hidden beyond visible surfaces.
- Build airflow into everyday routines once flood repairs are complete. Use windows and doors to ventilate damp-prone spaces after activities that add moisture, such as showering or cooking. Keep furniture slightly clear of walls where airflow is restricted, and avoid leaving wet items in closed rooms. If a subfloor stays damp despite ventilation, a subfloor ventilation system can help improve airflow below the home.
- Arrange support if mould returns, dampness persists, or ventilation changes aren’t reaching affected spaces. An inspection can help identify whether the issue involves concealed moisture, restricted airflow or existing mould. For help assessing recurring mould concerns, arrange a mould inspection and address the underlying conditions, not only the visible growth.
ABC Mould Cleaning Solutions: Air Purification & Scrubbing
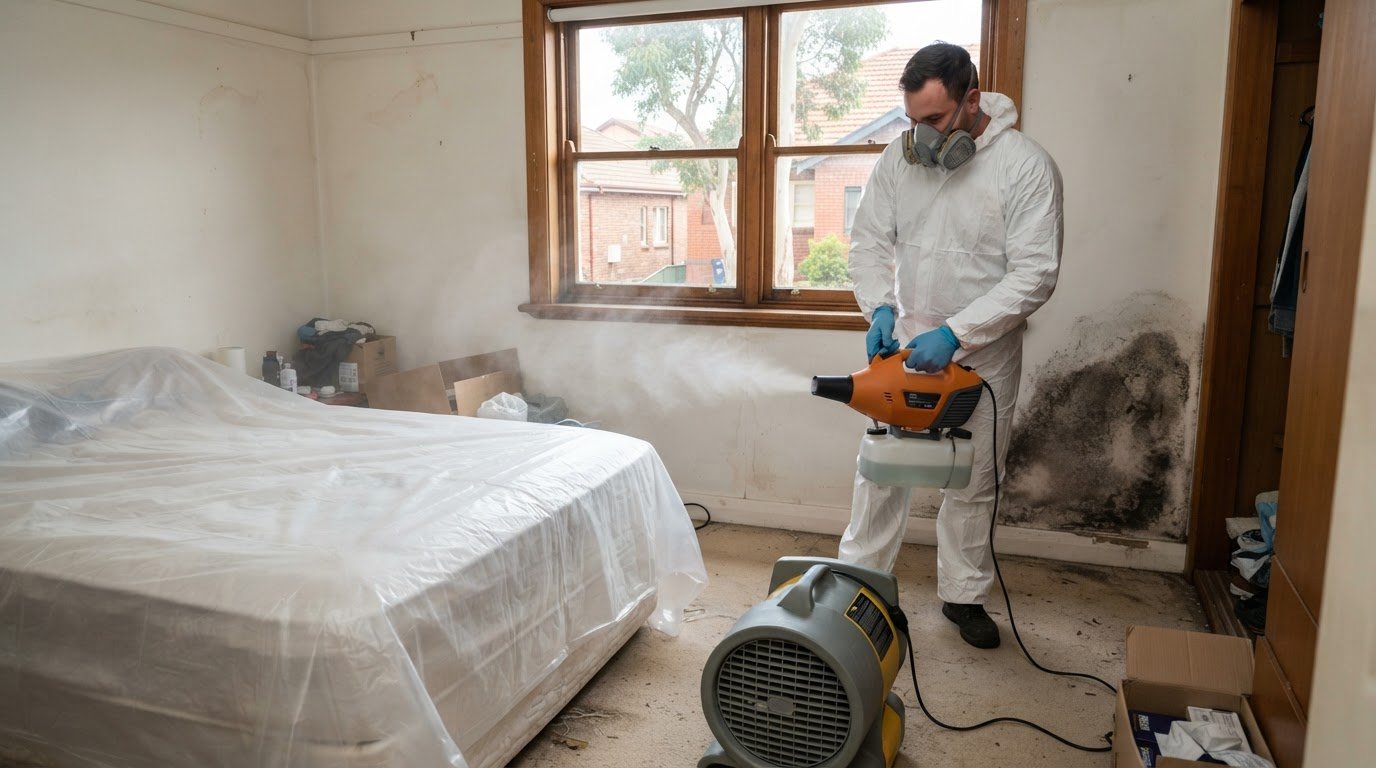
ABC Mould Cleaning Solutions can help when flood-related moisture has left visible mould, lingering spores or damp areas needing professional assessment. Its Mould Inspection Services help identify affected areas, while Mould Remediation addresses mould contamination. Air Purification & Scrubbing can support clean-up by addressing airborne spores as well as surface mould.
The company uses the Goldmorr System, a biodegradable fogging process designed to eliminate surface mould and airborne spores. If moisture persists beneath the home, Subfloor Ventilation System Installation can help improve airflow in that space. Professional support is particularly useful when mould is extensive, hidden in building materials or returning after drying and ventilation improvements.
Contact ABC Mould Cleaning Solutions to discuss flood-related mould concerns, or visit mouldremovalssydney.com.au.
Make the next step a lasting one
Once immediate clean-up is complete, keep moisture management part of your home’s ongoing care. Pay attention to changes after repairs, seasonal weather shifts or periods when rooms stay closed. A musty smell, new staining or damp-feeling surfaces can signal that an area needs another look, even if the original damage seems resolved.
Good post-flood structural drying and mould prevention is not only about restoring a room. It’s about understanding what changed in the property and responding before a small concern becomes another disruption. If you’re uncertain about lingering mould or hidden moisture, a professional assessment can help clarify the next practical step.
ABC Mould Cleaning Solutions offers Mould Inspection Services, Mould Remediation, and Air Purification & Scrubbing. Contact ABC Mould Cleaning Solutions to discuss your property and move forward with a clearer plan. You can take the next step with confidence.
Frequently Asked Questions
Does insurance cover mould remediation?
Australian home and building insurance may cover mould remediation when mould results from a covered water-damage event. Mould linked to long-term neglect, poor ventilation or gradual leaks is typically excluded. Photograph damage before clean-up and keep records of the water event, affected materials and drying work. Check your policy’s wording and reporting requirements, because the cause of the damage and the terms of your cover determine how a claim is handled.
How quickly does mould grow after flooding?
Mould can start developing on wet materials within 24 to 48 hours after flooding. Visible growth may appear within 3 to 7 days if damp conditions persist. Paper-faced plasterboard, timber and stored contents can show early signs, even while other surfaces look unchanged. Begin moisture removal promptly and inspect concealed or poorly ventilated areas, such as cupboards and wall edges, rather than waiting for obvious patches to appear.
How do I know if mould is growing inside my walls after a flood?
Look for a persistent musty smell, new staining, bubbling paint or swollen skirting boards near the flood line. These clues can indicate moisture behind a wall lining, but appearance alone can’t establish the extent. Compare damp areas with nearby unaffected surfaces, and note whether odour or staining returns after cleaning. A moisture survey can help locate hidden dampness before wall linings are replaced or the problem spreads.
How to Stop Mold from Growing After a Flood?
Remove moisture quickly, keep air moving through affected rooms and address the source of water entry. Reliable post-flood structural drying and mould prevention also includes checking enclosed spaces where damp air can linger, such as wardrobes and cupboards. Keep stored items away from wet walls, and avoid closing cavities or covering floors until materials have dried. If dampness or visible mould returns, arrange an inspection to investigate the underlying cause.
What are the health risks associated with mould exposure?
Mould exposure is a health concern, particularly for people with respiratory disease or immunocompromise. Those at higher risk shouldn’t carry out mould clean-up themselves. Avoid disturbing mouldy material, which can release spores into the air, and keep vulnerable occupants away from affected areas during clean-up. If someone in the home feels unwell around mould, reduce their exposure and seek appropriate health advice.
What health problems can mould cause?
Mould exposure can be especially concerning for people who already have respiratory disease or a weakened immune system. The specific effects depend on the person and their exposure, so don’t assume a musty smell or visible patch explains a health symptom. Keep affected people away from mould clean-up, and avoid dry-brushing growth. If symptoms occur or worsen in a mould-affected home, discuss them with a health professional.
How can you safely dry walls, floors and cavities after flooding?
Remove wet floor coverings where they prevent the underlying surface from drying, and create airflow around damp areas. Wall cavities may hold water even when paint feels dry, so use moisture readings to guide drying rather than touch alone. Don’t close an opened cavity while insulation or framing remains damp. Keep records of readings and check beneath edges, corners and fixed fittings where moisture can remain concealed.
When should flood-damaged plasterboard, insulation and flooring be removed or replaced?
Remove porous materials when they’re contaminated, remain wet or can’t be dried effectively. Wet insulation should be removed when opening a flooded wall cavity, and plasterboard may need removal to let the space dry. Carpet and underlay that can’t dry within 48 hours should be removed. Check flooring beneath carpets and furniture too, since trapped moisture can persist below the visible surface and affect later repairs.